When I emulate Gen 6 consoles like the PS2 and GameCube, I lean toward a CRT presentation over a clean upscale. Partly because those consoles were designed with CRTs in mind, and partly because upscaling can expose graphical artefacts, inconsistencies with pre-rendered backgrounds, that sort of thing. Beyond the nostalgia, a good CRT shader also pulls the whole picture into something that reads as more coherent to my eye.

That's personal preference, of course. Plenty of people, probably most, will still prefer a sharp upscaled image. But if you're in the CRT camp like me, the catch is that the best shaders for the job live inside RetroArch, and not everything you play runs there.
If you’re on Windows, that's the gap ShaderGlass fills.
What ShaderGlass Is
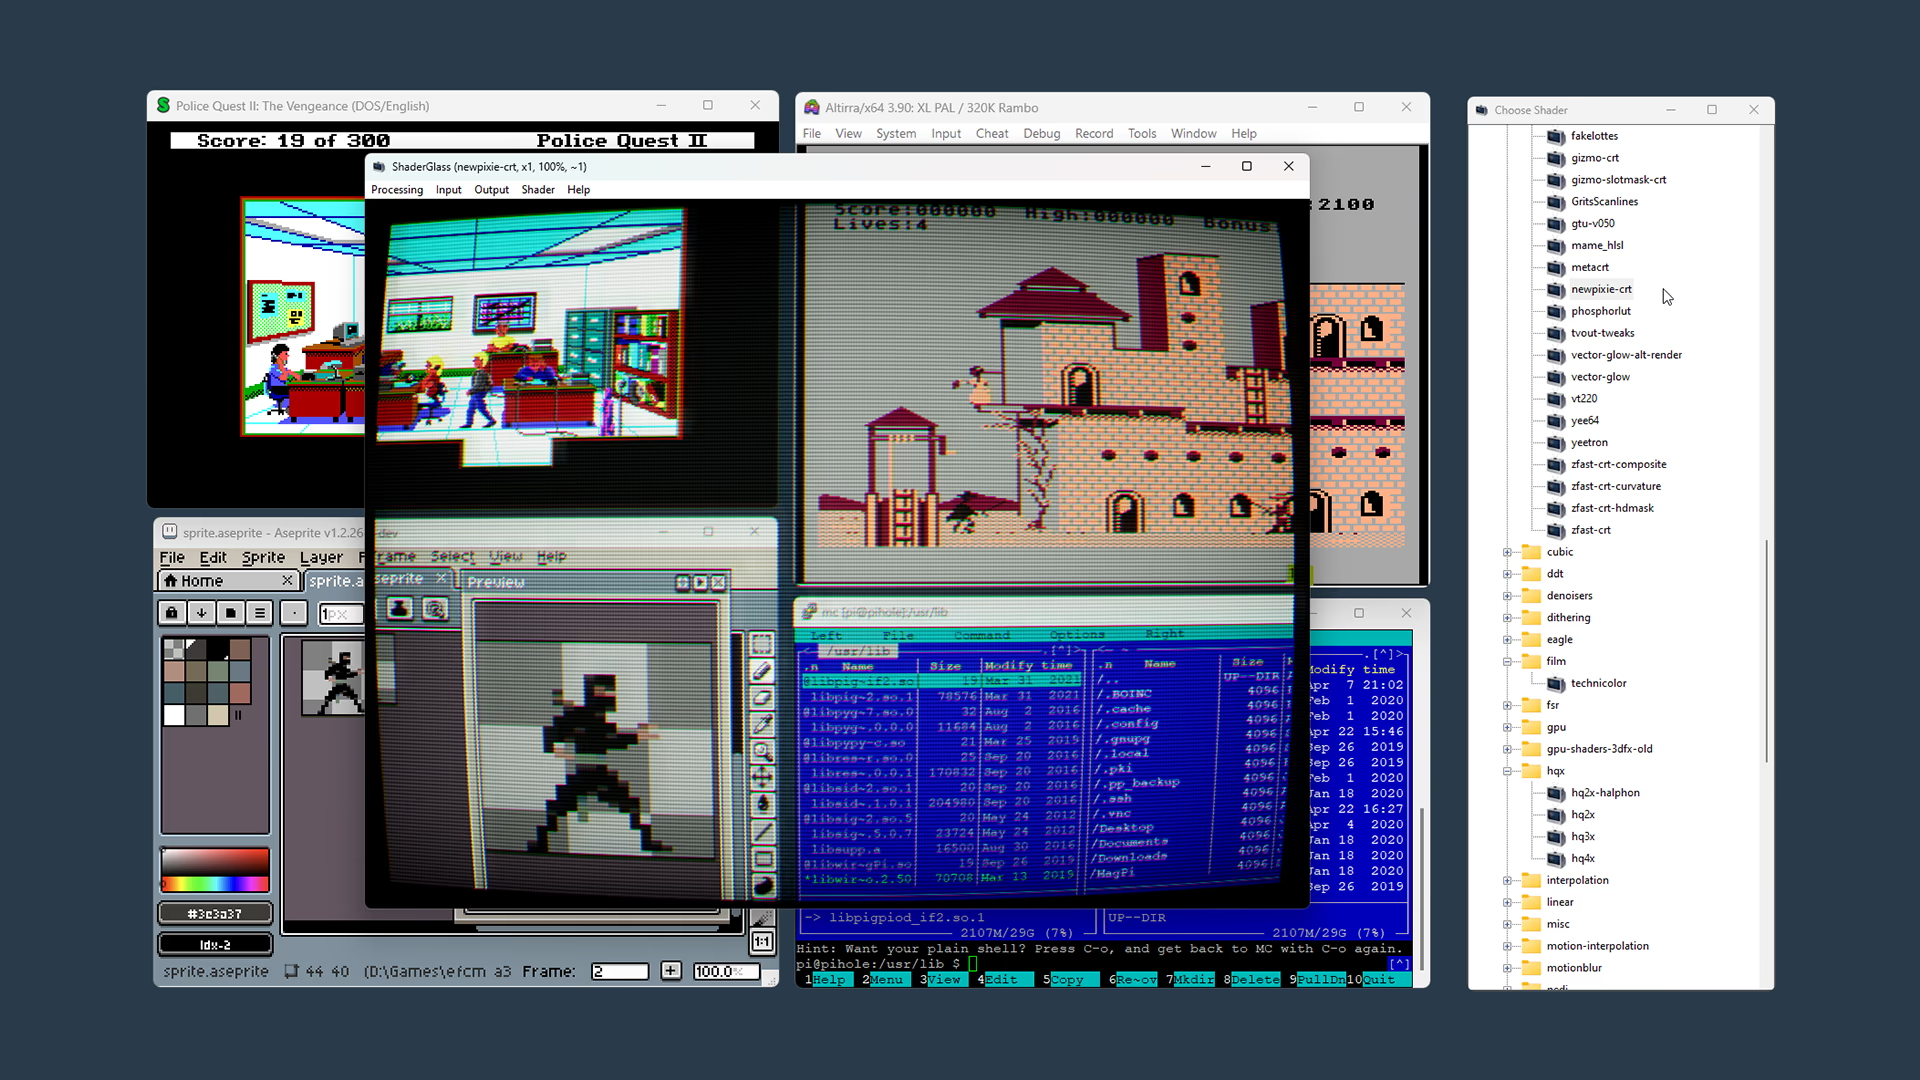
ShaderGlass by mausimus is a free open-source overlay that applies GPU shaders on top of any window in real time. It ships with over 1,200 shaders pulled from the RetroArch library: CRT simulation, upscalers, TV and VHS looks, sharpening, softening, and plenty more.
Because it works at the window level, it isn't limited to emulators. You can run it over a modern PC game, or even a video.
Setting It Up
You can follow along with RetroCrisis's video above or the written steps below.
- Download ShaderGlass from the GitHub releases page, extract the zip, and run ShaderGlass.exe. It's also on itch.io and Steam if you prefer.
- Open the shader library with Shader > Choose from library and pick a shader.
- Set your Pixel Size to match your source.
- Want to fine-tune your shader? Shader > Parameters… lets you tweak the active shader to taste.
- Happy with the result? Save it under Processing: choose Set as default profile to have it load every time, or Save profile as… to keep it as a separate file you can load.
- To fill the screen, use Output > Fullscreen or Ctrl+Shift+G. The same shortcut brings you back out.
That's really all you need to get up and running. ShaderGlass has plenty more to dig into, so tinker away if that's your thing.
One More Thing: Pixel Size
Of everything here, Pixel Size causes the most confusion, and it's also the one worth getting right. Pixel Size tells ShaderGlass the true resolution of your source. For the best results, you want the Pixel Size to match the scale your game is being displayed at.
So if your emulator renders a game and then scales it up, say 3x, set Pixel Size to x3 to match.
Changelog
JUN 9, 2026
- published post